- Published on
从开源项目中学习代码之DocumentScanner
- Authors
- Name
前言
想开一个开源项目代码学习系列,主要是讲一些优秀的开源项目,youtube博主的live code。把自己从中学到的知识进行整理,主要是方便自己后面写项目和扩展自己的技术视野。
介绍一位非常优秀的博主
我是在youtube上关注的,他的youtube主页链接:Kavsoft,他会全程快速的写一个项目,通过录屏的方式,节奏让人感觉非常的舒服,我会抽一些感兴趣的项目,自己把代码写一遍。然后再写一篇文章来总结其中学到的知识点。
DocumentScanner
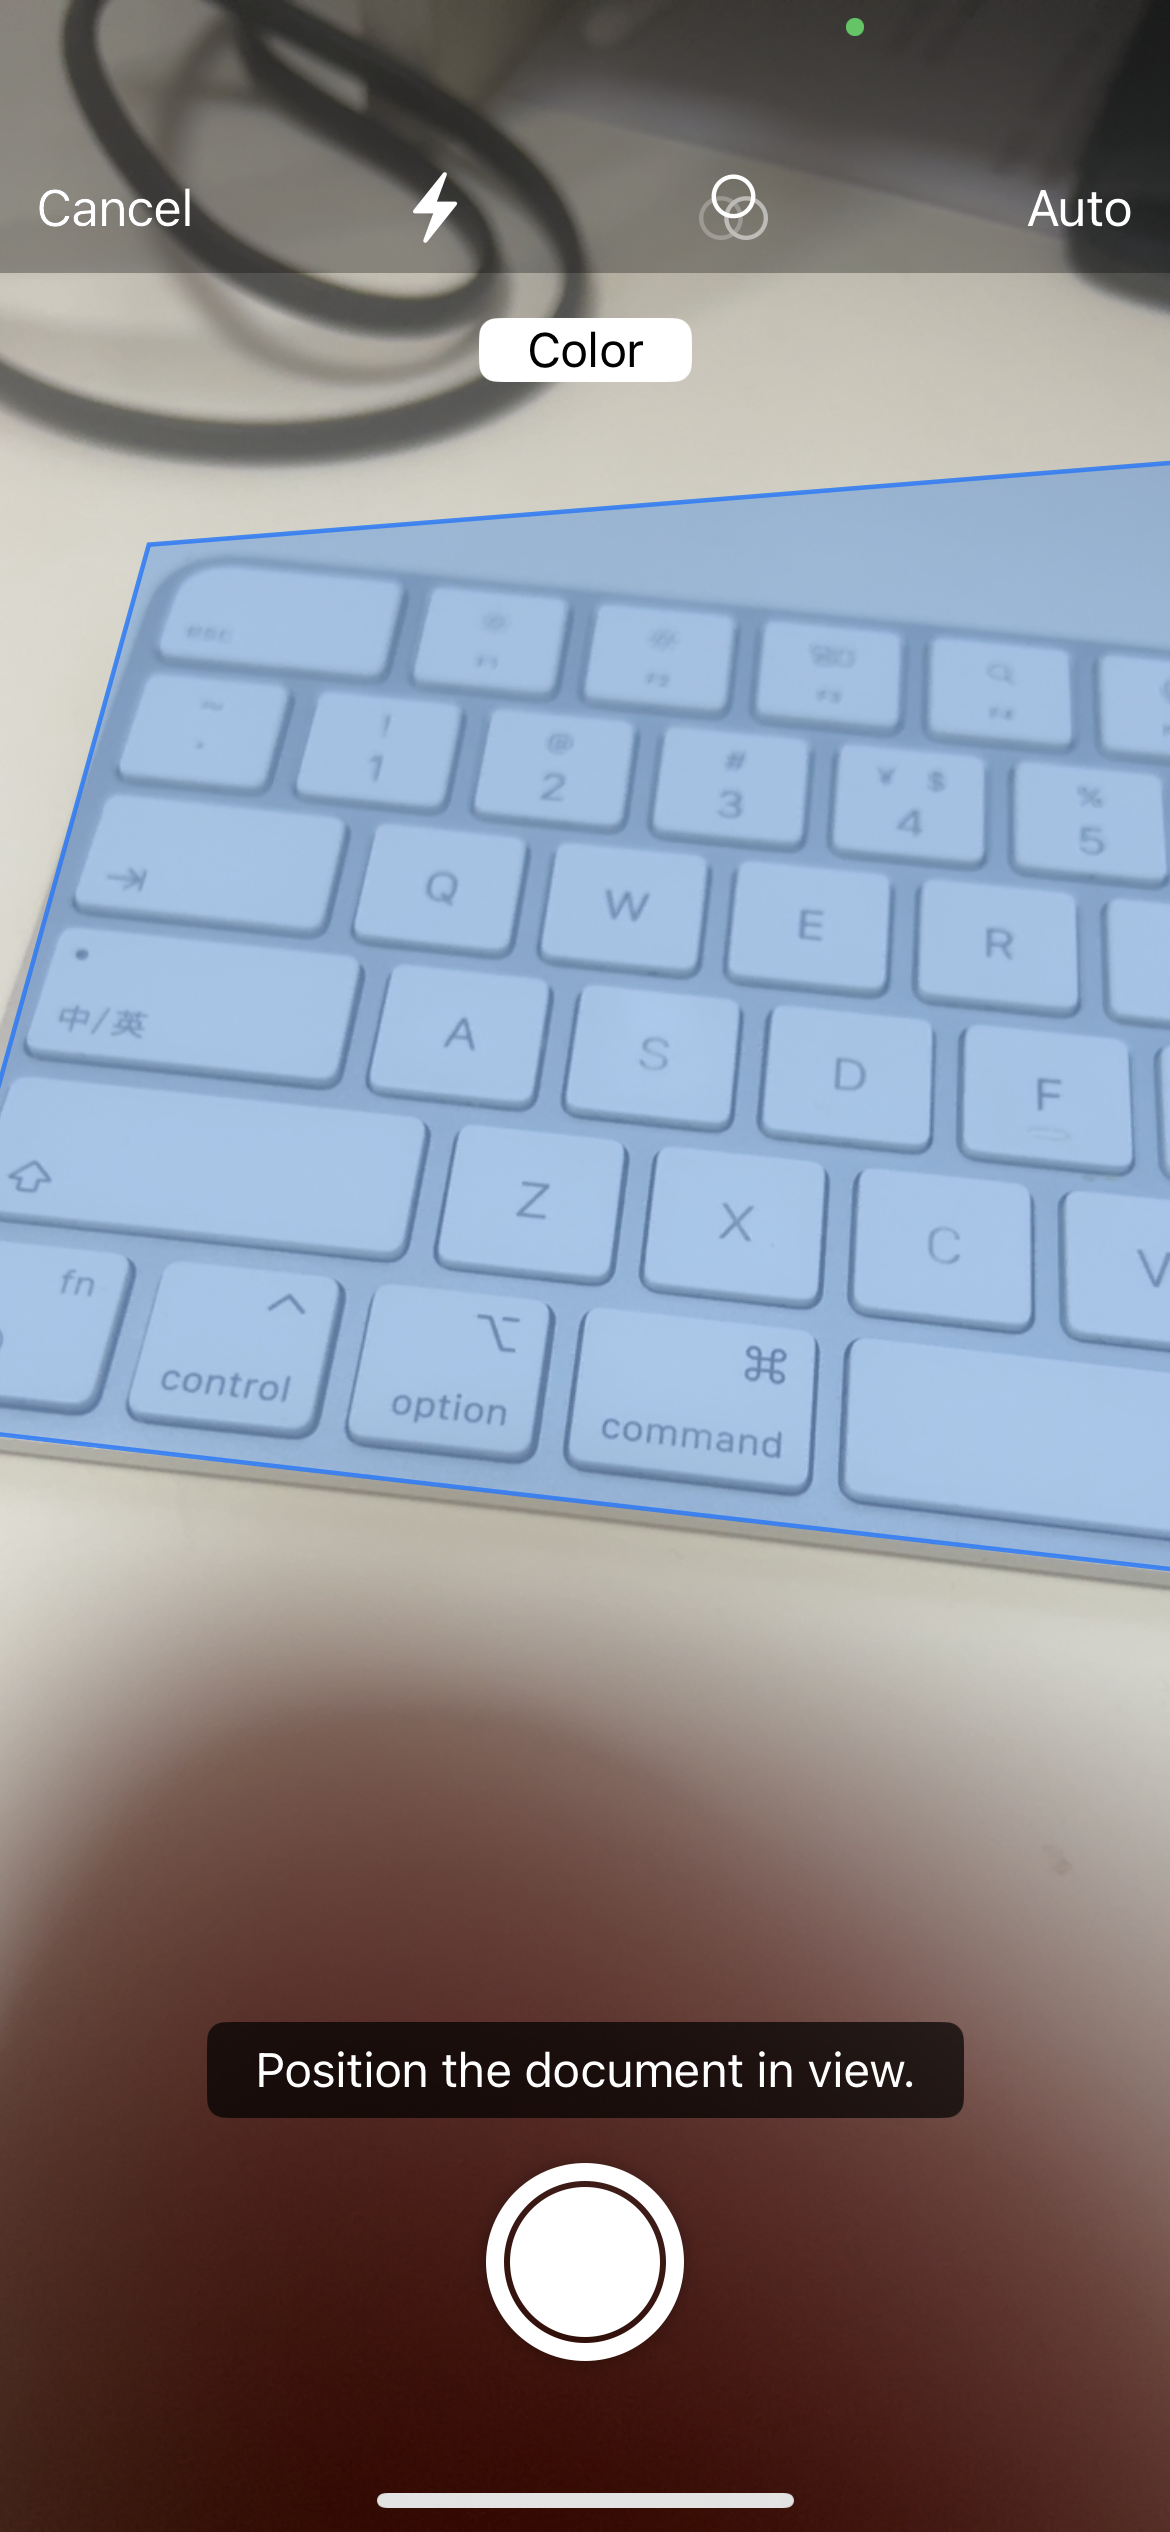
In this video, I’ll show you how to create a complete Document Scanner App from scratch with SwiftData, Biometric Authentication, VisionKit, etc., using SwiftUI.
相关知识点
设置字体的时候,可以在.largeTitle后面用.blod()来设置粗体
Text("What's New in \nDocument Scanner")
                .font(.largeTitle.bold())
通过@ViewBuilder来定义可重用组件视图
@ViewBuilder
    private func PointView(title: String, image: String, description: String) -> some View { //返回类型是some View
        HStack(spacing: 15) {
            Image(systemName: image)
                .font(.largeTitle)
                .foregroundStyle(.purple)

            VStack(alignment: .leading, spacing: 6) {
                Text(title)
                    .font(.title3)
                    .fontWeight(.semibold)
                Text(description)
                    .font(.callout)
                    .foregroundStyle(.gray)
            }
        }
    }
some View 代表遵从 View 协议的视图,这是一个不透明类型。
可以总结下.font(.xxx)中字体类型
@available(iOS 13.0, macOS 10.15, tvOS 13.0, watchOS 6.0, *)
extension Font {

    /// A font with the large title text style.
    public static let largeTitle: Font

    /// A font with the title text style.
    public static let title: Font

    /// Create a font for second level hierarchical headings.
    @available(iOS 14.0, macOS 11.0, tvOS 14.0, watchOS 7.0, *)
    public static let title2: Font

    /// Create a font for third level hierarchical headings.
    @available(iOS 14.0, macOS 11.0, tvOS 14.0, watchOS 7.0, *)
    public static let title3: Font

    /// A font with the headline text style.
    public static let headline: Font

    /// A font with the subheadline text style.
    public static let subheadline: Font

    /// A font with the body text style.
    public static let body: Font

    /// A font with the callout text style.
    public static let callout: Font

    /// A font with the footnote text style.
    public static let footnote: Font

    /// A font with the caption text style.
    public static let caption: Font

    /// Create a font with the alternate caption text style.
    @available(iOS 14.0, macOS 11.0, tvOS 14.0, watchOS 7.0, *)
    public static let caption2: Font

    /// Gets a system font that uses the specified style, design, and weight.
    ///
    /// Use this method to create a system font that has the specified
    /// properties. The following example creates a system font with the
    /// ``TextStyle/body`` text style, a ``Design/serif`` design, and
    /// a ``Weight/bold`` weight, and applies the font to a ``Text`` view
    /// using the ``View/font(_:)`` view modifier:
    ///
    ///     Text("Hello").font(.system(.body, design: .serif, weight: .bold))
    ///
    /// The `design` and `weight` parameters are both optional. If you omit
    /// either, the system uses a default value for that parameter. The
    /// default values are typically ``Design/default`` and ``Weight/regular``,
    /// respectively, but might vary depending on the context.
    @available(iOS 16.0, macOS 13.0, tvOS 16.0, watchOS 9.0, *)
    public static func system(_ style: Font.TextStyle, design: Font.Design? = nil, weight: Font.Weight? = nil) -> Font

    /// Gets a system font with the given text style and design.
    ///
    /// This function has been deprecated, use the one with nullable `design`
    /// and `weight` instead.
    @available(iOS, introduced: 13.0, deprecated: 100000.0, message: "Use `system(_:design:weight:)` instead.")
    @available(macOS, introduced: 10.15, deprecated: 100000.0, message: "Use `system(_:design:weight:)` instead.")
    @available(tvOS, introduced: 13.0, deprecated: 100000.0, message: "Use `system(_:design:weight:)` instead.")
    @available(watchOS, introduced: 6.0, deprecated: 100000.0, message: "Use `system(_:design:weight:)` instead.")
    @available(visionOS, introduced: 1.0, deprecated: 100000.0, message: "Use `system(_:design:weight:)` instead.")
    public static func system(_ style: Font.TextStyle, design: Font.Design = .default) -> Font

    /// A dynamic text style to use for fonts.
    public enum TextStyle : CaseIterable, Sendable {

        /// The font style for large titles.
        case largeTitle

        /// The font used for first level hierarchical headings.
        case title

        /// The font used for second level hierarchical headings.
        @available(iOS 14.0, macOS 11.0, tvOS 14.0, watchOS 7.0, *)
        case title2

        /// The font used for third level hierarchical headings.
        @available(iOS 14.0, macOS 11.0, tvOS 14.0, watchOS 7.0, *)
        case title3

        /// The font used for headings.
        case headline

        /// The font used for subheadings.
        case subheadline

        /// The font used for body text.
        case body

        /// The font used for callouts.
        case callout

        /// The font used in footnotes.
        case footnote

        /// The font used for standard captions.
        case caption

        /// The font used for alternate captions.
        @available(iOS 14.0, macOS 11.0, tvOS 14.0, watchOS 7.0, *)
        case caption2

        /// A collection of all values of this type.
        public static let allCases: [Font.TextStyle]
    }
}
Spacer(minLength: 0)
VStack {
    xxx()
    Spacer(minLength: 0)
    xxx()
}
可以通过minLength设置间距的最小值
App介绍视图可能通过.sheet方式弹出
 Home()
            .sheet(isPresented: $showIntroView) {
                IntroScreen()
                    .interactiveDismissDisabled()
            }
interactiveDismissDisabled 用户将无法通过拖动或其他交互方式关闭这个视图
SwiftUI专门用一章节来讲 Model Presentations SwiftUI/Model Presentations
同时 Human Interface Guide 也有一章节来讲 modality
其中有下面几种类型:
- sheet
- fullScreenCover
- popover
- alert
- fileExporter
- fileImporter
- fileMover
- fileDialog
- inspector
AppStorage的写法
@AppStorage("showIntroView") private var showIntroView: Bool = true
如何修改呢
Button {
                showIntroView.toggle() //可以直接修改
            } label: {
                Text("Start using Document Scanner")
                    .fontWeight(.bold)
                    .foregroundStyle(.white)
                    .hSpacing(.center)
                    .padding(.vertical,12)
                    .background(.purple.gradient, in: .capsule)
            }
Home页的组织方式
NavigationStack {
    ScrollView {
        LazyVGrid {
            ForEach {
                NavigationLink {

                } label: {

                }
            }
        }
    }
}
.fullScreenCover {

}
.alert {

}
.loadingScreen()
实际代码如下:
{
        NavigationStack {
            ScrollView(.vertical) {
                LazyVGrid(columns: Array(repeating: GridItem(spacing: 10), count: 2), spacing: 15) {
                    ForEach(documents) { document in
                        NavigationLink {
                            DocumentDetailView(document: document)
                                .navigationTransition(.zoom(sourceID: document.uniqueViewID, in: animationID))
                        } label: {
                            DocumentCardView(document: document, animationID:animationID)
                                .foregroundStyle(Color.primary)
                        }

                    }
                }
                .padding(15)
            }
            .navigationTitle("Document's")
            .safeAreaInset(edge: .bottom) {
                Createbutton()
            }
        }
        .fullScreenCover(isPresented: $showScannerView) {
            ScannerView { error in

            } didCancel: {
                /// Closing View
                showScannerView = false
            } didFinish: { scan in
                scanDocument = scan
                showScannerView = false
                askDocumentName = true
            }
            .ignoresSafeArea()

        }
        .alert("Document Name", isPresented: $askDocumentName) {
            //弹出框
            TextField("New Document", text: $documentName)

            Button("Save") {
                createDocument()
            }
            .disabled(documentName.isEmpty)
        }
        /// loading 界面
        .loadingScreen(status: $isLoading)
    }
safeAreaInset
ScrollView(.vertical) {
}
.safeAreaInset(edge: .bottom) {
    Createbutton()
}
比较常见的用法是在ScrollView上添加这个modifier。
SwiftUI官方的例子 The content view is anchored to the specified horizontal edge in the parent view, aligning its vertical axis to the specified alignment guide. The modified view is inset by the width of content, from edge, with its safe area increased by the same amount.
内容视图锚定在父视图指定的水平边缘,并按照指定的对齐参考线对齐其垂直轴。修改后的视图会从该边缘向内缩进内容视图的宽度,同时其安全区域相应增加相同的宽度。
struct ScrollableViewWithSideBar: View {
    var body: some View {
        ScrollView {
            ScrolledContent()
        }
        .safeAreaInset(edge: .leading, spacing: 0) {
            SideBarContent()
        }
    }
}
safeAreaInset 是一个 SwiftUI 修改器,用于在视图的指定边缘添加额外内容,同时调整该视图的安全区域以避免内容重叠。在给定的代码中,它将 SideBarContent() 放置在 ScrollView 的左侧,并确保 ScrollView 的内容从侧边栏右侧开始显示。
如何理解官方文档的描述
官方文档的描述是:“内容视图锚定在父视图的指定水平边缘,其垂直轴与指定的对齐指南对齐。修改后的视图从边缘向内缩进内容的宽度,其安全区域增加相同数量。”
我们可以这样理解:
“内容视图”指的是 SideBarContent(),它被锚定在父视图的左侧(领先边缘),垂直对齐方式由对齐指南决定(默认居中)。 “修改后的视图”指的是 ScrollView,它被向内缩进侧边栏的宽度(例如,侧边栏宽 100 点,ScrollView 从 x = 100 开始)。 “其安全区域增加相同数量”意味着 ScrollView 的安全区域从父视图的左侧开始位置向右移动了侧边栏的宽度,因此它的内容不会与侧边栏重叠。
ignoresSafeArea(_:edges:)
By default, the SwiftUI layout system sizes and positions views to avoid certain safe areas. This ensures that system content like the software keyboard or edges of the device don’t obstruct your views. To extend your content into these regions, you can ignore safe areas on specific edges by applying this modifier.
在默认情况下,SwiftUI 的布局系统会调整视图的大小和位置,以避免某些安全区域。这样可以确保系统内容(如软件键盘或设备边缘)不会遮挡你的视图。如果你希望让内容延伸到这些区域,可以使用此修饰符来忽略特定边缘的安全区域。
adding a background to your view 这个文章中设置不同的区域的背景的。其中有使用到ignoresSafeArea来铺满整个屏幕。
.fullScreenCover(isPresented: $showScannerView) {
            ScannerView { error in

            } didCancel: {
                /// Closing View
                showScannerView = false
            } didFinish: { scan in
                scanDocument = scan
                showScannerView = false
                askDocumentName = true
            }
            .ignoresSafeArea()

        }

如何实现一个 loading 动画
extension View {
    @ViewBuilder
        func loadingScreen(status: Binding<Bool>) -> some View {
            self
                .overlay {
                    ZStack {
                        Rectangle()
                            .fill(.ultraThinMaterial) //
                            .ignoresSafeArea()

                        ProgressView()
                            .frame(width: 40, height: 40)
                            .background(.bar, in: .rect(cornerRadius: 10))
                    }
                    .opacity(status.wrappedValue ? 1 : 0)
                    .allowsHitTesting(status.wrappedValue)
                    .animation(snappy, value: status.wrappedValue)
                }
        }
}
其中几行代码是值得去研究的
.fill(.ultraThinMaterial) 创建一个类似毛玻璃的效果
.background(.bar, in: .rect(cornerRadius: 10))
//A material matching the style of system toolbars.
.animation(snappy, value: status.wrappedValue)
A spring animation with a predefined duration and small amount of bounce that feels more snappy and can be tuned.
一种带有预设时长和轻微弹性的弹簧动画,具有更紧凑的感觉,并且可以进行调整。
通过 UIViewControllerRepresentable 协议在 SwiftUI 中使用 UIKit 框架
struct ScannerView: UIViewControllerRepresentable {
    var didFinishWithError: (Error) -> ()
    var didCancel: () -> ()
    var didFinish: (VNDocumentCameraScan) -> ()


    func makeCoordinator() -> Coordinator {
        Coordinator(parent: self)
    }

    func makeUIViewController(context: Context) -> some UIViewController {
        let controller = VNDocumentCameraViewController()
        controller.delegate = context.coordinator
        return controller
    }

    func updateUIViewController(_ uiViewController: UIViewControllerType, context: Context) {

    }

    class Coordinator: NSObject, VNDocumentCameraViewControllerDelegate {
        var parent: ScannerView
        init(parent: ScannerView) {
            self.parent = parent
        }

        func documentCameraViewController(_ controller: VNDocumentCameraViewController, didFinishWith scan: VNDocumentCameraScan) {
            parent.didFinish(scan)
        }

        func documentCameraViewControllerDidCancel(_ controller: VNDocumentCameraViewController) {
            parent.didCancel()
        }

        func documentCameraViewController(_ controller: VNDocumentCameraViewController, didFailWithError error: any Error) {
            parent.didFinishWithError(error)
        }
    }


}
平时我主要是使用的 UIViewRepresentable ,这里使用的 UIViewControllerRepresentable 总结一下其设计思路:
- 定义我们的要使用的 SwiftUI 的结构体,遵循 UIViewControllerRepresentable
struct ScannerView: UIViewControllerRepresentable {

}
- 我们可以给这个结构体定义需要的属性方便传值或者使用闭包的方式来传递值
    var didFinishWithError: (Error) -> ()
    var didCancel: () -> ()
    var didFinish: (VNDocumentCameraScan) -> ()
- 实现3个协议 UIViewControllerRepresentable 定义的方法
//1.实现这个协调者
func makeCoordinator()  -> Coordinator {
    Coordinator(parent: self)
}

//2.定义这个协调者
class Coordinator: NSObject, VNDocumentCameraViewControllerDelegate {
    var parent: ScannerView  //这个协调者的parent就是我们定义的SwiftUI

    //定义init方法
    init(parent: ScannerView) {
        self.parent = parent
    }

    //实现UIKit中VNDocumentCameraViewControllerDelegate定义的方法
    func documentCameraViewController(_ controller: VNDocumentCameraViewController, didFinishWith scan: VNDocumentCameraScan) {
        parent.didFinish(scan)
    }

    func documentCameraViewControllerDidCancel(_ controller: VNDocumentCameraViewController) {
        parent.didCancel()
    }

    func documentCameraViewController(_ controller: VNDocumentCameraViewController, didFailWithError error: any Error) {
        parent.didFinishWithError(error)
    }
}

//3.实现makeUIViewController(context: Context)
    func makeUIViewController(context: Context) -> some UIViewController {
        let controller = VNDocumentCameraViewController()
        //把其协议委托给上下文的协调者,也就是我们上面定义的Coordinator
        controller.delegate = context.coordinator
        return controller
    }
//4.实现updateUIViewController(_ uiViewController: UIViewControllerType, context: Context)
    func updateUIViewController(_ uiViewController: UIViewControllerType, context: Context) {

    }
创建 alert
.alert("Document Name", isPresented: $askDocumentName) {
            TextField("New Document", text: $documentName)

            Button("Save") {
                createDocument()
            }
            .disabled(documentName.isEmpty)
        }
alert swiftui 官方文档 最后的尾随闭包参数,是 @ViewBuilder actions: (T) -> A , 其容器的默认行为好像是Vstack。我们也不需要给其加上VStack容器。 另外在 alert 中的 Button .对其中的 label 类型有严格的要求,必须是 Text 类型,不然不会显示。
创建一个好看的Button不是那么简单
 @ViewBuilder
    private func Createbutton() -> some View {
        Button {
            showScannerView.toggle()
        } label: {
            HStack(spacing: 6) {
                Image(systemName: "document.viewfinder.fill")
                    .font(.title3)
                Text("Scan Documents")
            }
            .foregroundStyle(.white)
            .fontWeight(.semibold)
            .padding(.vertical,10)
            .padding(.horizontal,20)
            .background(.purple.gradient, in:.capsule)
        }
        .hSpacing(.center)
        .padding(.vertical, 10)
        .background {
            Rectangle()
                .fill(.background)
                .mask {
                    Rectangle()
                        .fill(.linearGradient(colors: [
                            .white.opacity(0),
                            .white.opacity(0.5),
                            .white,
                            .white
                        ], startPoint: .top, endPoint: .bottom))
                }
                .ignoresSafeArea()

        }
    }
作者一共用了34行代码才创建好一个Button。平时我在写自己的项目的时候,往往创建Button只想用1-2行代码。这也是我需要去学习的。
这段代码中有几个比较有意思的点
- semibold 半粗体
- hSpacing自定义的,为什么要取一个这样的名字
 @ViewBuilder
    func hSpacing(_ alignment: Alignment) -> some View {
        self.frame(maxWidth: .infinity, alignment: alignment)
    }
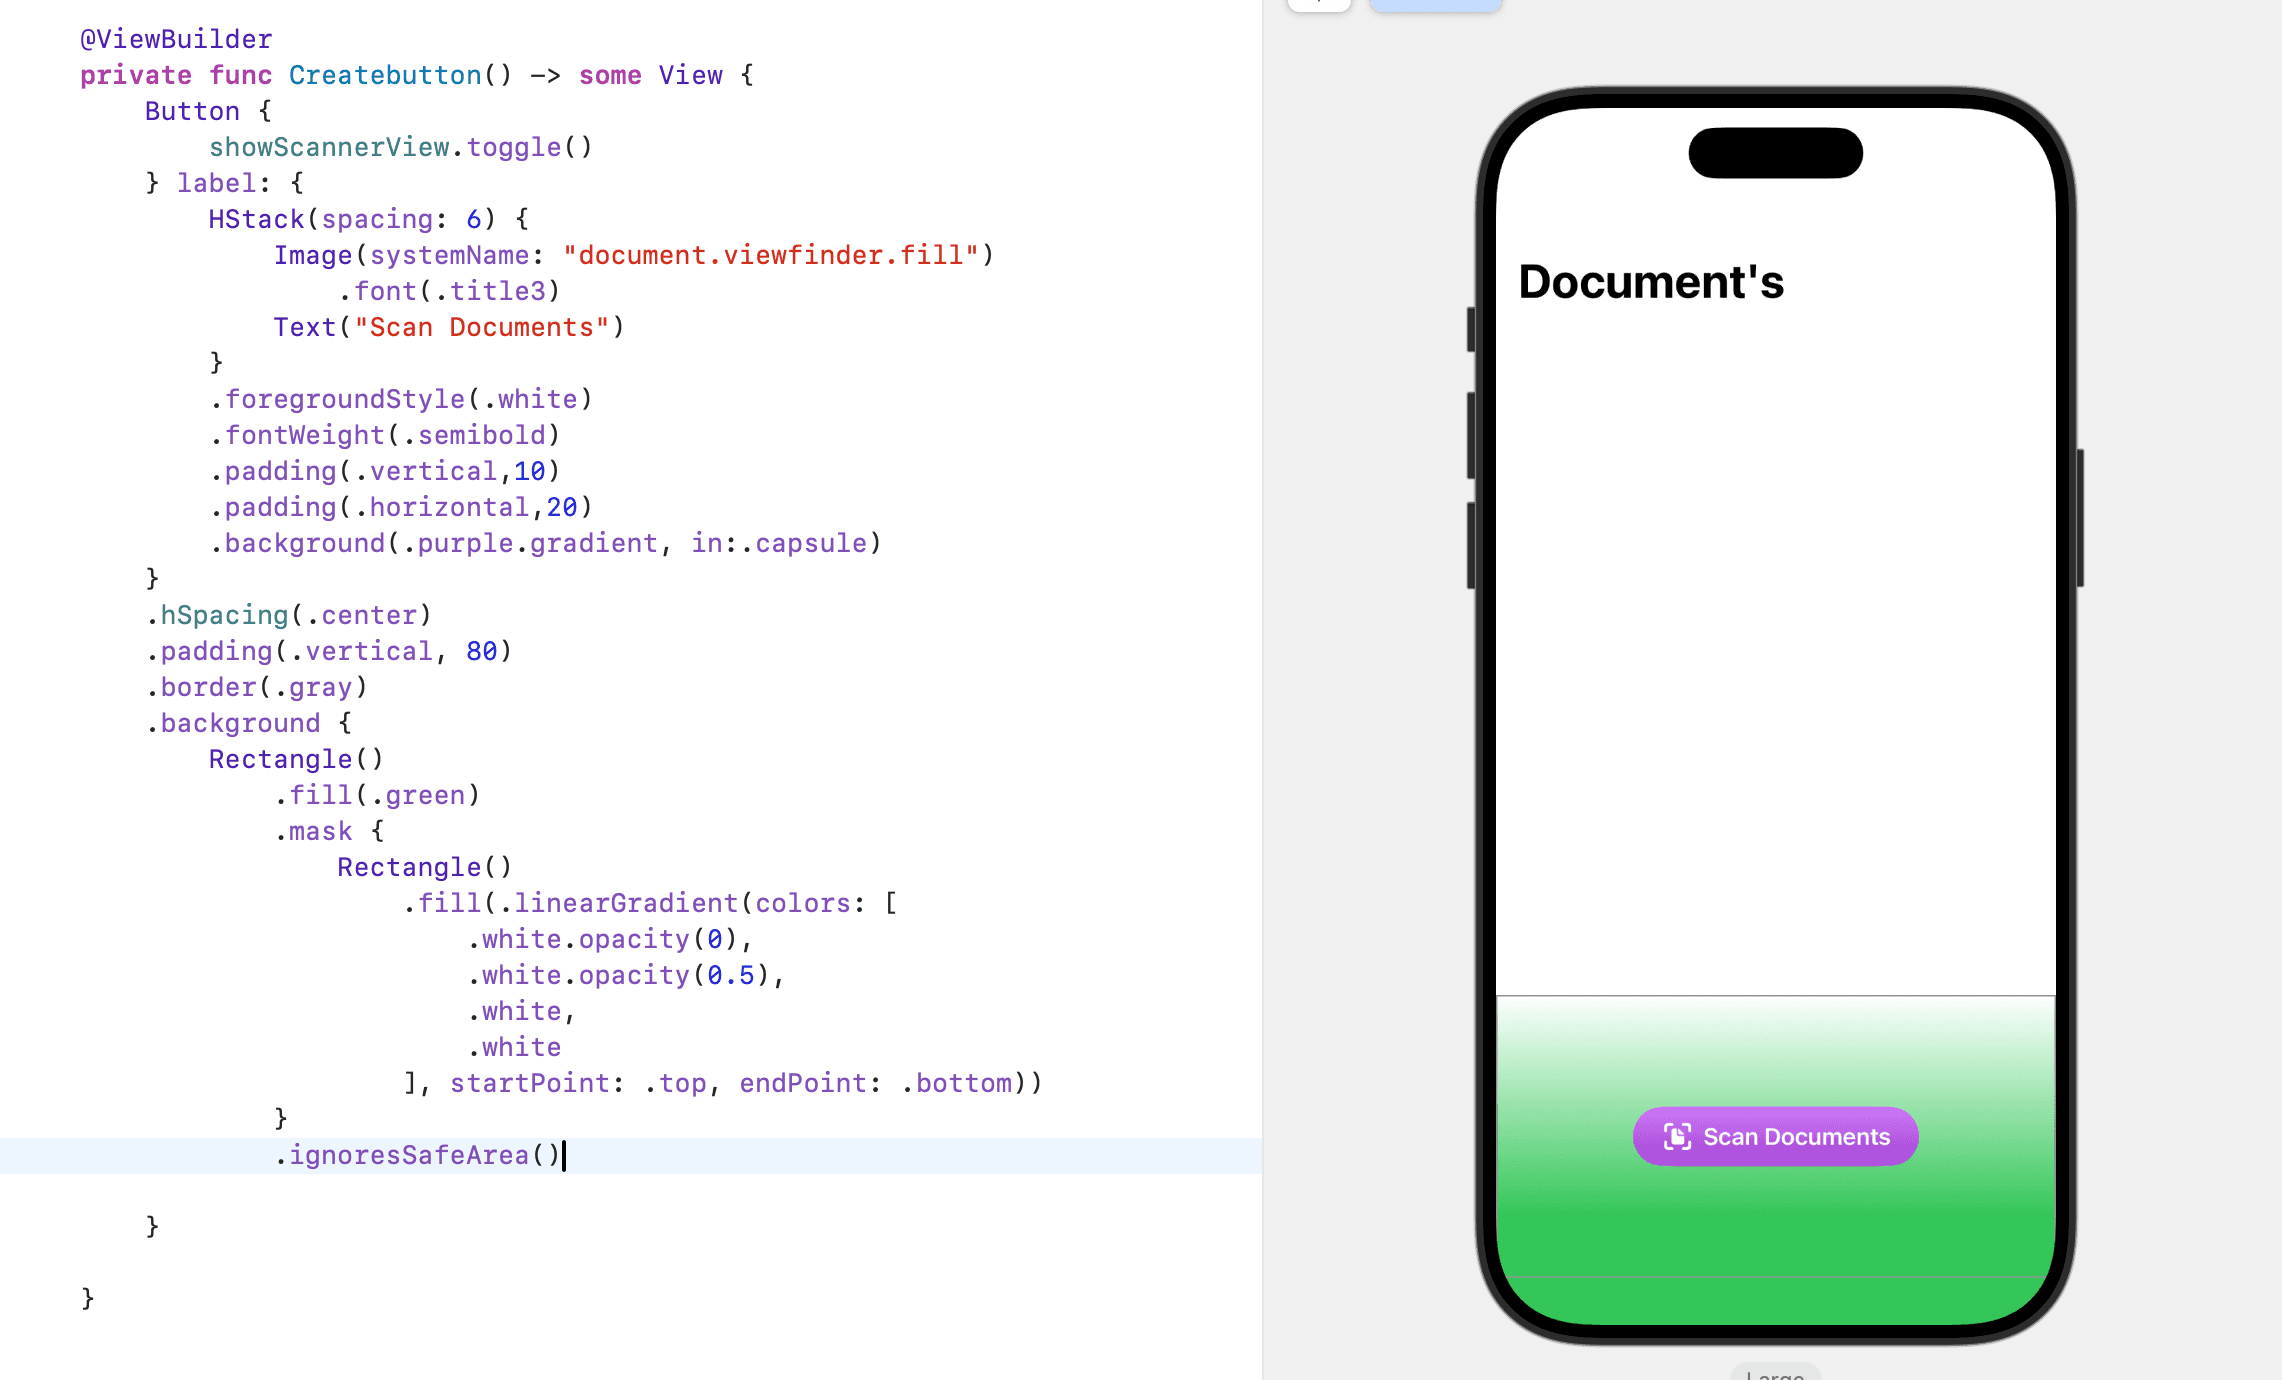
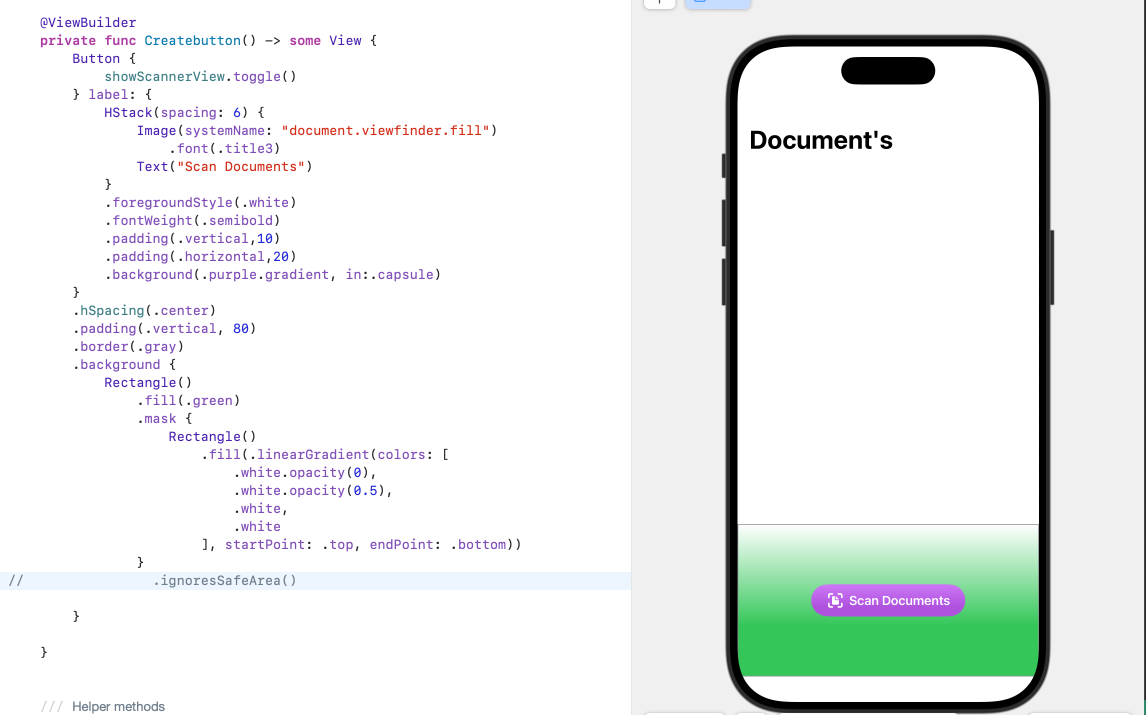
- background 的作用范围和 .hSpacing(.center) 、 .ignoresSafeArea() 都有关系。
在填充的背景上面加一个ignoresSafeArea感觉挺奇怪的。至少我之前不会去这样写

With ignoresSafeArea

Without ignoresSafeArea
针对ignoresSafeArea()
对于这个Modifier,我发现这个博主很喜欢用它,但是我对其原理还不是很了解,需要深入一下。 apple document ignoresSafeArea
Expands the safe area of a view
扩张view的安全区域 By default, the SwiftUI layout system sizes and positions views to avoid certain safe areas. This ensures that system content like the software keyboard or edges of the device don’t obstruct your views. To extend your content into these regions, you can ignore safe areas on specific edges by applying this modifier.
默认情况下,SwiftUI布局系统尺寸和安置views会避开明确的安全区域。这保证了像软键盘或设备边缘的内容不会挡住你们的views。去扩展你的内容到这些区域,你可以通过应用这个modifier到指定的边缘去忽视安全区域。
iPhone设备的安全区域是怎么定义的,哪些属于安全区域。
Relationship in SwiftData
How to define Relationship in swift
@attached(peer) public macro Relationship(
    _ options: Schema.Relationship.Option...,
    deleteRule: Schema.Relationship.DeleteRule = .nullify,
    minimumModelCount: Int? = 0,
    maximumModelCount: Int? = 0,
    originalName: String? = nil,
    inverse: AnyKeyPath? = nil,
    hashModifier: String? = nil)
    = #externalMacro(module: "SwiftDataMacros", type: "RelationshipPropertyMacro")
使用 Relationship 创建一个一对多的关系。
@Model
class Document {
    var name: String
    var createdAt: Date = Date()
    @Relationship(deleteRule: .cascade, inverse: \DocumentPage.document)
    var pages: [DocumentPage]?
    var isLocked: Bool = false
    /// For Zoom Transition
    var uniqueViewID: String = UUID().uuidString

    init(name: String, pages: [DocumentPage]? = nil) {
        self.name = name
        self.pages = pages
    }
}

@Model
class DocumentPage {
    var document: Document?
    var pageIndex: Int

    /// Since it holds image data of each document page
    @Attribute(.externalStorage)
    var pageData: Data

    init(document: Document? = nil, pageIndex: Int, pageData: Data) {
        self.document = document
        self.pageIndex = pageIndex
        self.pageData = pageData
    }
}
其中的Document和DocumentPage通过 @Relationship(deleteRule: .cascade, inverse: \DocumentPage.document) var pages: [DocumentPage]? 建立了一对多的关系, 一个Document将拥有多个DocumentPage,每个DocumentPage将会有一个Document。deleteRule: .cascade表示级联删除,当一个Document被删除后,其包含的pages:[DocumentPage] 也会被删除。
@Attribute(.externalStorage)
    var pageData: Data
表示会将 pageData 存放在数据库外部,通常用于大数据存储。(比如图片、视频、二进制数据)
这样做有什么好处:
防止数据库膨胀,提高查询性能。
Concurrency - Task
Task.detached(priority: .high) {
    await MainActor.run {

    }
}
Task是Concurrency中定义一个结构体。
- 创建和管理异步任务。
- 桥接同步和异步代码。
- 提供优先级和上下文控制。
- 支持结构化并发和错误处理。
Task.detached中的detache是分离的意思。意思是创建一个独立的代码运行环境。
MainActor.run的定义如下:
extension MainActor {

    /// Execute the given body closure on the main actor.
    public static func run<T>(resultType: T.Type = T.self, body: @MainActor @Sendable () throws -> T) async rethrows -> T where T : Sendable
}
可以发现其被标记为async,那么在Task中执行时,需要加上await。
导航过渡动画
extension NavigationTransition where Self == ZoomNavigationTransition {

    /// A navigation transition that zooms the appearing view from a
    /// given source view.
    ///
    /// Indicate the source view using the
    /// ``View/matchedTransitionSource(id:namespace:)`` modifier.
    ///
    /// - Parameters:
    ///   - sourceID: The identifier you provide to a corresponding
    ///     `matchedTransitionSource` modifier.
    ///   - namespace: The namespace where you define the `id`. You can create
    ///     new namespaces by adding the ``Namespace`` attribute
    ///     to a ``View`` type, then reading its value in the view's body
    ///     method.
    public static func zoom(sourceID: some Hashable, in namespace: Namespace.ID) -> ZoomNavigationTransition
}
NavigationTransition:这是一个协议(protocol),很可能来自 SwiftUI 或相关框架,用于定义导航时的过渡动画。 ZoomNavigationTransition:这是一个具体的类型,实现了 NavigationTransition 协议,表示一种“缩放”(zoom)效果的导航过渡。 extension ... where Self == ZoomNavigationTransition:这是一个条件扩展,表示这个扩展只适用于 NavigationTransition 的实现类型是 ZoomNavigationTransition 的情况。换句话说,它为 ZoomNavigationTransition 添加了一个静态方法。
.navigationTransition(.zoom(sourceID: document.uniqueViewID, in: animationID))和.matchedTransitionSource(id: document.uniqueViewID, in: animationID) 应该成对出现。
 NavigationLink {
    DocumentDetailView(document: document)
        .navigationTransition(.zoom(sourceID: document.uniqueViewID, in: animationID))
} label: {
    DocumentCardView(document: document, animationID:animationID)
        .foregroundStyle(Color.primary)
        .matchedTransitionSource(id: document.uniqueViewID, in: animationID)
}
不过我们这里加不加.matchedTransitionSource(id: document.uniqueViewID, in: animationID)的效果一样。
系统一共定义了两个内置导航动画。一个是zoom,一个automatic。
Error Handing
 if case .failure(_) = result {
    /// Removing the temporary file
    guard let fileURL else { return }
    try? FileManager.default.removeItem(at: fileURL)
}
try的核心作用是标记一段可能会抛出错误的函数调用或表达式,告诉编译器和开发者,这段代码可能会出错,需要特殊处理。
func functionMaybeThrowsError() throws -> Int {

}

do {
    let result = try functionMaybeThrowsError()
} catch {
    print("\(error)")
}
其中的 do catch 的作用就是错误处理结构。
还有一种用法是 try? 表示会返回一个可选值,如果返回nil,程序也不会崩溃。
try!的作用是确认会返回一个值,如果返回nil。程序会崩溃。
因为是从OC转到swift上来的,我发现自己对swift的错误处理机制的使用和其设计思想还掌握得不够好。自己现在的一个状态就是什么都懂一点,但是又没有特别深入。这其实多少限制了自己的成长,我们需要做的是把swift、SwiftUI的特性掌握得非常牢才行。
总结
整个项目能学到很多的东西,多做一些这种类型的项目,还是很有好处的,这种side-project可以先满足自己的需求。争取能做一些项目上线。